编译安装
首先更新系统
sudo yum update
安装编译依赖项
sudo yum install -y gcc-c++ ncurses-devel openssl-devel cmake
下载 MySQL 源代码
wget https://dev.mysql.com/get/Downloads/MySQL-8.0/mysql-boost-8.0.28.tar.gz
解压源代码
tar -zxvf mysql-boost-8.0.28.tar.gz
切换目录
cd mysql-8.0.28
创建编译目录
mkdir build
切换目录
cd build
配置编译目录
cmake .. -DDOWNLOAD_BOOST=1 -DWITH_BOOST=./boost
编译 MySQL
make -j$(nproc)
安装 MySQL
make install
安装 MySQL
sudo bin/mysqld --initialize --user=mysql --basedir=/usr/local/mysql --datadir=/usr/local/mysql/data
启动 MySQL 服务
sudo bin/mysqld_safe --user=mysql &
设置 MySQL 根密码
sudo bin/mysql_secure_installation
验证安装
sudo bin/mysql -u root -p
压缩包安装
(参考:https://cloud.tencent.com/developer/article/2181993?areaSource=102001.16&traceId=9uyUdKQ-ytp30WMqze9Mi)
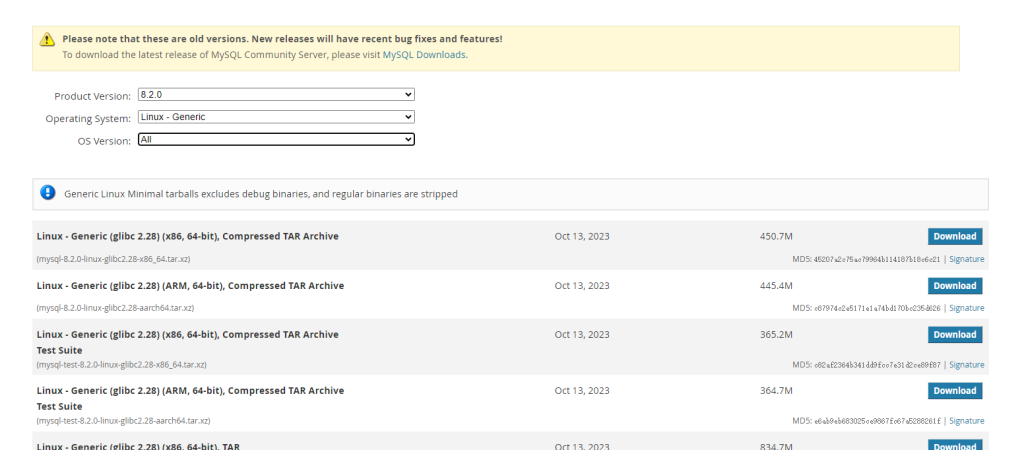
到Mysql官网下载安装包(https://downloads.mysql.com/archives/community)

把下载好的压缩包上传到服务器
进入文件所在目录
cd /usr/local
解压
tar -xvf mysql-8.0.27-linux-glibc2.17-x86_64-minimal.tar.xz
重命名
mv mysql-8.0.27-linux-glibc2.17-x86_64-minimal mysql-8.0.27
创建MySQL配置文件
vim /etc/my.cnf
配置如下:
[mysqld]
port=3306
basedir=/usr/local/mysql-8.0.27
datadir=/usr/local/mysql-8.0.27/data
socket=/usr/local/mysql-8.0.27/data/mysql.sock

character-set-server=utf8
collation-server=utf8_general_ci
#performance_schema_max_table_instances=400
#table_definition_cache=400
#table_open_cache=256
#datadir=/var/lib/mysql
#socket=/var/lib/mysql/mysql.sock
# Disabling symbolic-links is recommended to prevent assorted security risks
#symbolic-links=0
# Settings user and group are ignored when systemd is used.
# If you need to run mysqld under a different user or group,
# customize your systemd unit file for mariadb according to the
# instructions in http://fedoraproject.org/wiki/Systemd
max_allowed_packet=1024M
max_connections=1000
# Recommended in standard MySQL setup
sql_mode=NO_ZERO_IN_DATE,NO_ZERO_DATE,ERROR_FOR_DIVISION_BY_ZERO,NO_ENGINE_SUBSTITUTION
wait_timeout=2147483
interactive_timeout=2147483
connect_timeout=20
thread_cache_size=256
lower_case_table_names=1
innodb_strict_mode=0
# 创建新表时将使用的默认存储引擎
default-storage-engine=INNODB
default_authentication_plugin=mysql_native_password
innodb_file_per_table=1
log_bin_trust_function_creators=1
[mysqld_safe]
log-error=/usr/local/mysql-8.0.27/log/mysqld.log
pid-file=/usr/local/mysql-8.0.27/log/mysqld.pid
default-character-set=utf8
[mysql]
default-character-set=utf8
[mysql.server]
default-character-set=utf8
[client]
default-character-set=utf8
socket=/usr/local/mysql-8.0.27/data/mysql.sock
#
# include all files from the config directory
#
#!includedir /etc/my.cnf.d
创建存储数据的 data 目录和日志 log 目录
cd /usr/local/mysql-8.0.27
mkdir data
mkdir log
echo "" > /usr/local/mysql-8.0.27/log/mysqld.log
初始化mysql服务
./bin/mysqld --initialize --user=root --basedir=/usr/local/mysql-8.0.27 --datadir=/usr/local/mysql-8.0.27/data
复制mysql.server脚本到资源目录,并赋予执行权限
cp ./support-files/mysql.server /etc/rc.d/init.d/mysqld
chmod +x /etc/rc.d/init.d/mysqld
将 mysqld 服务加入到系统服务并检测是否生效
chkconfig --add mysqld
chkconfig --list mysqld
启动mysql
service mysqld start
报错
Starting MySQL. ERROR! The server quit without updating PID file (/usr/local/mysql-8.0.27/data/VM-0-16-centos.pid).
解决方案:编辑mysqld文件
vim /etc/rc.d/init.d/mysqld
找到start模块,添加--user=root到mysqld_safe 后面即可
再次执行
service mysqld start
配置环境变量
vim /etc/profile
结尾处添加
MYSQL_HOME=/usr/local/mysql-8.0.27
export PATH=$PATH:$MYSQL_HOME/bin
保存退出运行
source /etc/profile
更改密码
mysql -uroot -p
记录初始密码然后修改密码
alter user 'root'@'localhost' identified by '123456';
设置远程链接
GRANT ALL PRIVILEGES ON *.* TO 'root'@'%';
保错
ERROR 1410 (42000): You are not allowed to create a user with GRANT
解决方法
use mysql
update user set host='%' where user='root';
再次执行
GRANT ALL PRIVILEGES ON *.* TO 'root'@'%';
执行两次
grant all on *.* to 'root'@'%' with grant option;
退出
exit
然后设置防火墙,开放3306端口或者关闭防火墙。


文章评论